Real-World Acura ADAS Calibrations: Shop Case Studies
Advanced Driver Assistance Systems (ADAS) have redefined safety and performance for late-model Acura vehicles. For technicians, collision centers, and Acura owners, understanding the real-world process of ADAS calibration—especially after sensor replacement or collision repair—is critical for road safety and system reliability. This comprehensive guide explores actual shop case studies, technical pitfalls, calibration requirements, and expert strategies for Acura ADAS systems. Whether you’re sourcing OEM parts or verifying system integrity post-repair, this resource provides actionable insights and checklists for every stage of the process.
If you’re seeking the technical foundation for genuine Acura components, start with our Acura OEM Parts: Technical Reference, Authenticity & Sourcing category to ensure every ADAS calibration begins with the right hardware.
The Immediate Answer: Why Acura ADAS Calibration Matters
ADAS calibration on Acura vehicles is a non-negotiable step after sensor replacement, windshield repair, or collision. Calibration ensures that systems like adaptive cruise control, lane keeping assist, collision mitigation braking, and blind spot monitoring function as designed. Failure to calibrate can result in false warnings, system deactivation, or, worse, lack of intervention during critical moments on the road.
Key Takeaway:
Every time an ADAS sensor (camera, radar, or lidar) is replaced, moved, or disturbed, a precise calibration is required to restore factory-intended operation—no exceptions.
The Hidden Problem: ADAS Calibration Is Not “Plug and Play”
Many repair shops and even some Acura owners mistakenly believe that ADAS sensors are self-calibrating or that generic scan tools can perform all required functions. In reality, Acura’s ADAS architecture is highly sensitive to sensor alignment, mounting surface tolerances, and software configuration. Overlooking even minor installation details can compromise the entire system.
Common Hidden Pitfalls
- Non-OEM Glass or Mounts: Aftermarket windshields or brackets may alter sensor viewing angles.
- Improper Torque or Fastening: Camera or radar units not torqued to spec can shift over time.
- Environmental Variables: Calibration requires controlled lighting, flat surfaces, and correct target placement.
- Software Mismatch: Using outdated or non-Acura scan tools can lead to incomplete calibrations or missed fault codes.
Real-World Case Study 1: 2021 Acura RDX Windshield Replacement
Scenario
A 2021 Acura RDX arrives at a collision repair center with a cracked windshield. The vehicle is equipped with AcuraWatch™, including a forward-facing camera for Lane Keeping Assist and Collision Mitigation Braking. The glass is replaced with OEM Honda/Acura glass, and the camera is reinstalled.
Calibration Process
- Pre-Scan:
Technician connects an Acura-approved scan tool to verify existing DTCs (Diagnostic Trouble Codes). - Physical Inspection:
Camera mounting bracket is checked for distortion or debris. - Static Calibration:
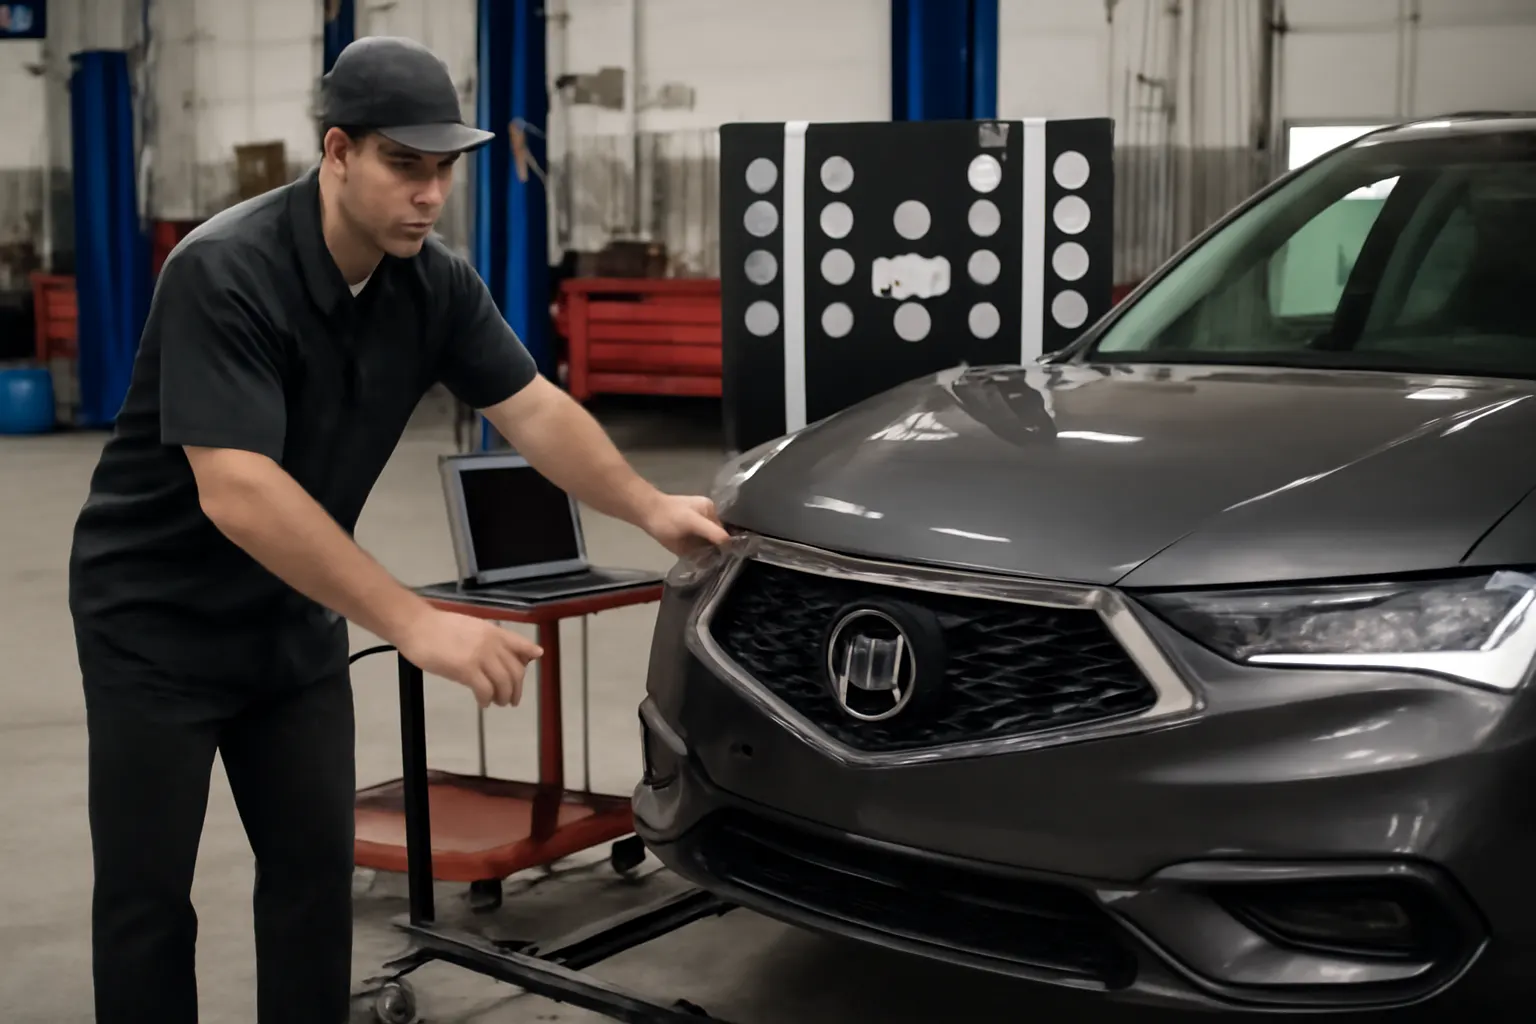
Calibration targets are positioned precisely according to Acura service specifications—distance, height, and angle are measured using laser tools. - Dynamic Calibration:
After static calibration, the vehicle is road-tested under specified conditions (speed, lane markings, ambient light) to allow the camera to learn real-world references. - Post-Scan:
System is re-checked for DTCs; calibration status is confirmed as “complete.”
Outcome
All ADAS functions operate normally, with no warning lights or erratic behavior. The technician documents calibration data for liability and future service reference.
Real-World Case Study 2: 2023 Acura MDX Front Radar Sensor Replacement
Scenario
A 2023 Acura MDX is brought in after a minor front-end collision. The adaptive cruise control (ACC) radar sensor is visibly damaged and replaced with a genuine Acura part.
Calibration Process
- Pre-Calibration Checks:
- Bumper cover and radar mounting surface are inspected for deformation.
- Radar bracket alignment is measured against factory specs.
- Radar Installation:
- New radar sensor is installed using Acura torque specs and mounting procedures.
- Static Radar Calibration:
- A radar reflector target is positioned at a precise distance and angle.
- The scan tool initiates calibration mode; sensor alignment is adjusted as needed.
- Dynamic Verification:
- The vehicle is driven in real traffic to verify ACC engagement, safe following distance, and collision warning responsiveness.
Outcome
The MDX’s ACC and collision mitigation systems pass all self-tests. No DTCs or warning messages appear. The customer receives a calibration certificate for documentation.
The Technical Foundation: Acura ADAS System Overview
Understanding the unique architecture of Acura’s ADAS is essential for accurate calibration. Late-model Acuras use a network of cameras, radar, ultrasonic, and sometimes lidar sensors, all integrated with the vehicle’s ECU and safety modules.
Key ADAS Components on Modern Acuras
- Forward-Facing Camera:
Typically mounted behind the windshield, responsible for lane and traffic sign recognition. - Millimeter-Wave Radar:
Located behind the front grille, used for ACC and collision mitigation. - Blind Spot Radar:
Embedded in rear quarter panels for lane change assist. - Surround View Cameras:
Provide 360-degree monitoring for parking and low-speed maneuvers. - Rear Cross Traffic Alert Sensors:
Located in the rear bumper for reversing safety.
Note: Each sensor has strict installation tolerances and unique calibration procedures, as defined by Acura and SAE International standards.
When and Why Acura ADAS Calibration Is Required
Situations Demanding Calibration
- Windshield Replacement:
Any disturbance to the forward camera’s mount requires immediate recalibration. - Front-End Collision Repair:
Even minor impacts can shift radar alignment or sensor orientation. - Suspension or Ride Height Changes:
Altered geometry affects sensor aiming. - Bumper, Grille, or Mirror Replacement:
Components housing sensors must be restored to factory position and angle. - Software Updates or Module Replacement:
New ECUs or firmware may reset calibration parameters.
Overlooked Triggers
- Paint Work Near Sensors:
Excess paint thickness can alter radar/lidar transmission. - Glass Tinting or Aftermarket Films:
Non-OEM materials may interfere with camera visibility or IR transmission.
The Calibration Process: Step-by-Step Checklist
Proper Acura ADAS calibration is a multi-stage process requiring precision, documentation, and the right tools. Here’s a detailed checklist for shops and technicians:
| Step | Action Item | Notes |
|---|---|---|
| 1. Pre-Scan | Connect Acura/Honda scan tool; record DTCs | Use latest OEM software |
| 2. Physical Check | Inspect sensor mounts, brackets, and adjacent bodywork | Look for bends, corrosion, debris |
| 3. OEM Parts Verify | Confirm all sensors, glass, and brackets are genuine Acura parts | Avoid aftermarket substitutions |
| 4. Target Setup | Position calibration targets per Acura specs (distance, height) | Use laser/measurement tools |
| 5. Static Calibration | Initiate static calibration via scan tool | Follow on-screen prompts exactly |
| 6. Dynamic Calibration | Road test under specified conditions (speed, markings, light) | Some systems require both static/dynamic |
| 7. Post-Scan | Verify DTCs cleared; confirm calibration status | Print/store calibration report |
| 8. Customer Documentation | Provide calibration certificate and explanation | For liability and insurance purposes |
Sourcing Authentic Acura ADAS Components
Using genuine Acura components is non-negotiable for ADAS reliability and compliance with safety standards. Aftermarket or counterfeit sensors, brackets, or glass can introduce subtle misalignments or signal degradation that generic scan tools cannot always detect.
Why OEM Matters:
- Precision Engineering: Acura calibrates its ADAS components to exacting tolerances.
- Software Compatibility: Only genuine parts guarantee full software integration.
- Safety Compliance: Meets NHTSA and SAE International standards for crash avoidance and occupant protection.
For sourcing and fitment verification, consult our Acura Model Fitment Guide: VIN & Trim Specifics and learn how to spot counterfeits in Spotting Counterfeit Acura Parts: A Technician’s Perspective.
Case Study 3: 2022 Acura TLX Blind Spot Sensor Misalignment
Scenario
A 2022 Acura TLX exhibits persistent blind spot warning lights after quarter panel repair. The body shop replaced the rear bumper and reinstalled the blind spot radar sensor.
Diagnosis and Calibration
- Pre-Scan:
Multiple DTCs related to “Blind Spot Sensor Alignment.” - Physical Inspection:
The sensor bracket is found to be slightly bent due to improper handling during bumper installation. - Bracket Replacement:
A new OEM bracket is installed; sensor is mounted to factory torque spec. - Calibration:
Using an Acura scan tool, the blind spot system is recalibrated with the vehicle on a level surface. - Verification:
System passes all functional checks; warning lights are extinguished.
Lessons Learned
Even minor bracket deformation can cause major ADAS faults. Always use new OEM hardware if original mounting points are compromised.
The Role of Environmental and Shop Factors
Acura’s calibration procedures are sensitive to the shop environment. Proper lighting, level floors, and undisturbed calibration zones are essential. Many shops fail calibrations due to overlooked variables such as:
- Uneven Shop Floors: Alters sensor aiming angles.
- Incorrect Target Placement: Even a centimeter off can cause calibration failure.
- Ambient Light Variability: Glare or low light can confuse camera sensors.
Best Practice: Dedicate a calibration bay with marked floors, adjustable lighting, and regular equipment verification.
Understanding Diagnostic Trouble Codes (DTCs) in Acura ADAS
Acura ADAS modules store highly specific DTCs when calibration or sensor integrity is compromised. These codes are not always generic OBD-II codes and often require an Acura/Honda-specific scan tool for interpretation.
Common ADAS-Related DTCs
- U3000-49: Camera Misalignment
- C1A10-54: Radar Internal Failure
- B2A60-92: Blind Spot Sensor Calibration Required
Action: Never clear ADAS DTCs without first completing the recommended calibration or repair procedure. Document all codes before and after service for liability and future diagnostics.
Post-Calibration Verification: Ensuring System Integrity
Calibration is not complete until all systems are verified both statically (in the shop) and dynamically (on the road). Acura’s service manuals specify test drives under certain speeds, lane conditions, and ambient lighting to confirm real-world system readiness.
Verification Steps
- Static Confirmation:
- Use scan tool to confirm calibration status; all DTCs clear.
- Dynamic Test Drive:
- Engage adaptive cruise, lane keeping, and collision mitigation in real traffic.
- Confirm all warning indicators extinguish and systems operate as intended.
- Customer Education:
- Explain ADAS features, limitations, and recalibration triggers to the owner.
Calibration Documentation: Protecting Shop and Customer
Detailed calibration records are vital for both shop liability and customer assurance. In the event of a post-repair incident, documentation proves that all manufacturer-mandated steps were followed.
What to Document
- Pre- and post-scan DTC reports.
- Calibration tool serial numbers and software versions.
- Target placement measurements and photos.
- Technician name and certification.
- Date, mileage, and environmental conditions.
Tip: Many insurance companies now require calibration certificates for ADAS-equipped vehicles after collision or glass repair.
ADAS Calibration and Recalls: Staying Ahead of Safety Bulletins
Acura, like all automakers, issues recalls and technical service bulletins (TSBs) related to ADAS systems. Some involve software updates, sensor hardware, or calibration procedures. Regularly check the NHTSA recall database for Acura-specific ADAS issues.
Example:
A recall may require reprogramming of the collision mitigation control unit or replacement of a faulty radar sensor. Always verify that all campaigns are completed before calibration.
Maintenance and Ongoing ADAS Integrity
Calibration is not a one-time event. Acura recommends periodic ADAS system checks as part of routine maintenance, especially after any service affecting suspension, steering, or body geometry.
Maintenance Checklist
- Inspect sensor mounting points for corrosion or physical damage.
- Verify that all glass and body panels remain OEM and undisturbed.
- Perform an ADAS system scan at every major service interval.
- Educate customers on behaviors that may affect calibration (e.g., towing, accessory installation).
For scheduled intervals and bulletins, see our Acura Maintenance Intervals & Service Bulletins resource.
AutoPartEx Positioning: Your Partner in Acura ADAS Reliability
At AutoPartEx, our technical resources, fitment guides, and OEM sourcing channels empower shops, technicians, and Acura owners to complete ADAS repairs with confidence. From genuine sensor procurement to calibration checklists and recall alerts, we bridge the gap between factory standards and real-world shop challenges.
Explore our Acura OEM Parts: Technical Reference, Authenticity & Sourcing to ensure every ADAS repair starts with the right foundation—and trust AutoPartEx to keep your Acura’s safety systems performing at their peak.