
Advertisement
Restoring AMC braking systems demands more than basic know-how; it requires a careful approach to sourcing, compatibility, and installation—especially when dealing with the brake proportioning valve, a component notorious for fitment quirks and failure modes. This blog distills real-world shop stories, identifies common pitfalls, and delivers actionable guidance to help you achieve safe, reliable results. Whether you’re tackling a classic Javelin restoration or maintaining a daily-driven Eagle, you’ll find practical advice and expert-level checklists to keep your AMC’s brakes roadworthy.
If you’re looking for a foundational overview of AMC brake proportioning valve fitment, failures, and replacement strategies, visit our AMC Brake Proportioning Valve: Fitment, Failures, and Expert Replacement Guidance page for deep-dive technical content and model-specific recommendations.
Why AMC Brake Service Is a Unique Challenge
AMC vehicles—especially those built from the late 1960s through the early 1980s—feature a diverse array of braking system designs. Even among similar models, there are significant variations in brake proportioning valve types, mounting hardware, and line routing. Many AMC enthusiasts and technicians underestimate the complexity of these systems, leading to fitment headaches, performance issues, and, in some cases, critical safety failures.
The Immediate Answer: Know Your System Before You Start
Before you order parts or begin disassembly, identify your AMC’s exact brake system configuration. This includes:
- Year, model, and trim level
- Factory brake setup (disc/drum, drum/drum, manual/power)
- Original or modified proportioning valve type and location
- Brake line routing and thread types
This up-front research is the single most effective way to avoid costly mistakes and ensure a safe, functional result.
Hidden Problems: Common Pitfalls in AMC Brake Restorations
Parts Sourcing Nightmares
Many AMC brake proportioning valves are discontinued, and aftermarket replacements are often generic or only partially compatible. Shop stories abound of new valves with mismatched ports, incorrect mounting brackets, or incompatible thread pitches. Even reputable suppliers sometimes mislabel parts, leading to wasted time and frustration.
Compatibility Surprises
AMC frequently changed valve designs—even within the same model year. Swapping a proportioning valve from a 1974 Javelin into a 1975 Hornet? The ports may look similar, but internal valving and pressure settings can differ dramatically, affecting brake balance and safety.
The “Looks Right, Doesn’t Work” Trap
Some installers, eager to finish a job, will force-fit a visually similar valve. This can lead to subtle but dangerous issues: premature rear wheel lockup, spongy pedal feel, or chronic brake drag. These problems are often misdiagnosed as master cylinder or booster faults, leading to unnecessary parts replacement.
Deeper Technical Explanation: How the AMC Brake Proportioning Valve Works
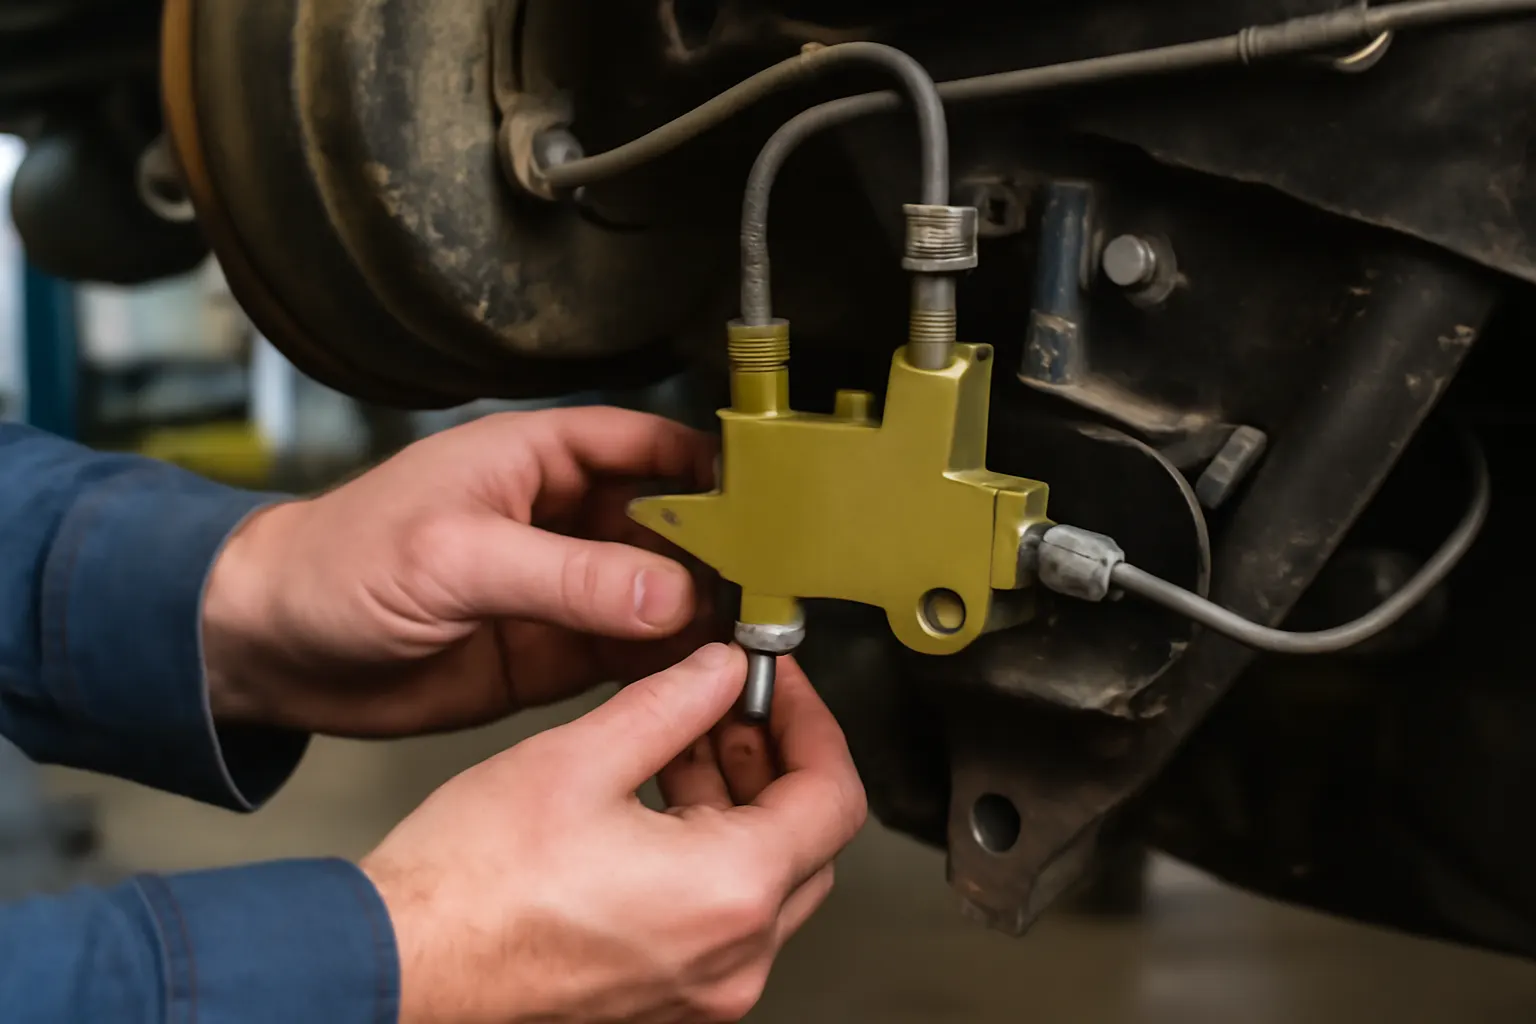
The brake proportioning valve is a critical safety device. Its job is to modulate hydraulic pressure between the front and rear brakes, preventing premature rear lockup and ensuring balanced stopping power. In AMC vehicles, the valve’s design varies by brake system:
- Disc/Drum Systems: Use a combination valve with a proportioning section for the rear drums and a metering/hold-off section for the front discs.
- Drum/Drum Systems: Rely on a simpler valve or in some cases, a distribution block without true proportioning.
- Aftermarket/Modified Systems: May use universal or adjustable valves, which require careful tuning to match original performance.
The valve responds to hydraulic pressure and weight transfer. If mismatched, internal spring rates or orifice sizes can dramatically alter brake behavior. For example, a proportioning valve designed for front disc/rear drum systems will not function safely on a drum/drum setup, and vice versa.
Advertisement
Real-World Shop Stories: What Can Go Wrong
Case 1: The Mismatched Valve
A 1973 AMC Javelin owner sourced a “universal” proportioning valve from an online retailer. The unit bolted in, but the rear brakes locked up under moderate braking. After weeks of troubleshooting, the shop traced the issue to an incorrect pressure threshold in the new valve—designed for a heavier vehicle with rear discs.
Lesson: Always verify the pressure settings and internal design of any replacement valve against factory specifications.
Case 2: The Thread Pitch Surprise
An AMC Eagle restoration project stalled when the new proportioning valve’s ports didn’t match the original brake line fittings. The installer attempted to force-thread the lines, damaging both the valve and the lines. Ultimately, the correct valve (with proper SAE or metric threads) had to be special-ordered.
Lesson: AMC used both SAE and metric fittings across different years and suppliers. Always check thread pitch and port size before installation.
Case 3: The "Invisible" Leak
A shop replaced a leaking proportioning valve on a 1978 Gremlin, only to find persistent soft pedal feel and uneven brake response. Upon closer inspection, a hairline crack in the new valve’s casting was found—barely visible, but enough to cause a slow fluid leak and internal air ingress.
Lesson: Even new parts can be defective. Always pressure-test the system after installation and inspect for micro-leaks.
Sourcing AMC Brake Proportioning Valves: Expert Tips
Where to Start
- OEM vs. Aftermarket: Original AMC valves are rare and often expensive. Quality aftermarket options exist, but require careful vetting.
- Trusted Vendors: Use suppliers with AMC expertise and a track record of correct fitment. Avoid “universal” listings unless you’re prepared to modify lines and brackets.
- Cross-Reference: Use AMC parts catalogs and verified technical resources to cross-check part numbers and applications.
Sourcing Checklist
| Step | Task | Details |
|---|---|---|
| 1 | Identify System | Disc/Drum, Drum/Drum, or Modified |
| 2 | Record Part Numbers | Compare original casting numbers and supplier listings |
| 3 | Confirm Thread Pitch | SAE or Metric; check all ports |
| 4 | Inspect Mounting | Bracket style, bolt spacing, orientation |
| 5 | Pressure Ratings | Confirm internal valve specs match original |
| 6 | Vendor Reputation | Read reviews, ask for application confirmation |
Pro Tip: Document your original valve with clear photos and measurements before removal. This helps suppliers confirm the correct replacement and speeds troubleshooting if issues arise.
Diagnosing AMC Brake Proportioning Valve Failures
Symptoms of a Faulty Valve
- Rear wheels lock up before the front (or vice versa)
- Spongy or inconsistent pedal feel
- Persistent brake warning light (if equipped)
- Fluid leaks at the valve or line connections
- Uneven brake pad/shoe wear
Diagnostic Steps
- Visual Inspection: Look for leaks, cracks, or corrosion.
- Pedal Test: With engine off, press brake pedal firmly. If pedal slowly sinks, suspect internal leak or bypass.
- Wheel Lockup Test: On a safe surface, gently apply brakes and observe which wheels lock first.
- Pressure Gauge Test: Install hydraulic gauges at front and rear lines. Apply brakes and compare pressures; significant mismatch indicates valve malfunction.
For in-depth diagnostics, see our Brake System Diagnostics Article.
Installation Guidance: Best Practices for AMC Brake Proportioning Valves
Preparation
- Clean all brake lines and fittings before removal.
- Use line wrenches to prevent rounding off fittings.
- Have new copper washers and thread sealant on hand (if required).
Installation Steps
- Remove Old Valve: Carefully disconnect lines, labeling each for correct reassembly.
- Inspect Brake Lines: Check for corrosion, cracks, or stripped threads.
- Install New Valve: Mount securely using correct hardware. Do not overtighten.
- Connect Lines: Match each line to its correct port. Start all fittings by hand to avoid cross-threading.
- Bleed System: Follow AMC-specific bleeding procedure to remove air from all circuits.
- Check for Leaks: Pressurize system and inspect all connections.
Advertisement
For detailed installation walkthroughs, reference our Amc Brake Valve Installation Guide.
Brake System Compatibility: Avoiding Costly Mistakes
Model-Year Variations
AMC often made running changes to brake hardware within a single model year. Always check your vehicle’s build date and brake system codes. Don’t assume a “1975 AMC” part will fit all 1975 models.
Aftermarket Upgrades
If you’ve upgraded to front disc brakes or swapped axles, the original proportioning valve may no longer provide correct brake balance. Consider using an adjustable valve and fine-tuning brake bias for your setup.
Thread and Fitting Reference
AMC used both inverted flare (SAE) and bubble flare (metric) fittings in different years and models. Mismatched fittings can cause leaks, stripped threads, or catastrophic line failure. Always verify before assembly.
Maintenance and Longevity: Keeping Your AMC Brakes Reliable
Regular Inspection Intervals
- Inspect brake lines, hoses, and valve for leaks or corrosion every 12 months or 12,000 miles.
- Replace fluid at least every two years to prevent internal corrosion and maintain valve function.
Valve Longevity Tips
- Use only DOT-approved brake fluid; mixing types can cause seal failure.
- Avoid overtightening fittings, which can crack valve housings.
- If storing the vehicle, periodically cycle the brakes to prevent sticking or internal corrosion.
Compatibility Warnings: What Not to Mix
Don’t Swap Blindly
Swapping a proportioning valve from a different AMC model or year without confirming compatibility is risky. Internal valving, pressure thresholds, and port arrangements can differ, even if the valve “looks” the same.
Watch for Reproduction Pitfalls
Some reproduction valves are cosmetically identical but use different internals, leading to unexpected brake behavior. Always test drive in a controlled environment after installation and be prepared to swap valves if results aren’t as expected.
Shop-Proven Troubleshooting Checklist
Use this checklist when diagnosing AMC brake system issues:
- Confirm System Type: Disc/Drum or Drum/Drum?
- Check Valve Part Number: Does it match AMC specs?
- Inspect for Leaks: Visual check at valve and lines.
- Test Pedal Feel: Firm or spongy?
- Check Wheel Lockup: Which wheels lock first?
- Pressure Test: Compare front/rear line pressures.
- Bleed Brakes Thoroughly: Air in lines mimics valve failure.
- Inspect Brake Pads/Shoes: Uneven wear suggests imbalance.
- Verify Fitment: Are all ports and fittings correct?
- Test Drive: Controlled stop from 20–30 mph; monitor brake response.
Expert Solution Path: Restoring AMC Brakes with Confidence
- Research First: Gather all relevant information about your AMC’s brake system before ordering parts.
- Source Carefully: Use reputable suppliers and confirm all specs—don’t trust generic listings.
- Install Methodically: Take your time, label everything, and follow AMC-specific procedures.
- Test Extensively: Pressure-test, bleed thoroughly, and conduct multiple test drives before considering the job complete.
- Document Everything: Keep records of part numbers, suppliers, and installation notes for future reference.
AutoPartEx: Your Partner in AMC Brake Restoration
At AutoPartEx, we understand the unique challenges of AMC brake systems. Our technical editorial team curates only the most accurate, model-specific fitment data and partners with trusted vendors to ensure you receive the right part the first time. With our guidance, you can avoid the pitfalls that plague so many AMC restorations and enjoy safe, reliable braking for years to come.
Explore our comprehensive AMC Brake Proportioning Valve: Fitment, Failures, and Expert Replacement Guidance for in-depth technical resources, or consult our Amc Brake Proportioning Valve Guide for detailed troubleshooting and installation tips.
References
Advertisement