
Advertisement
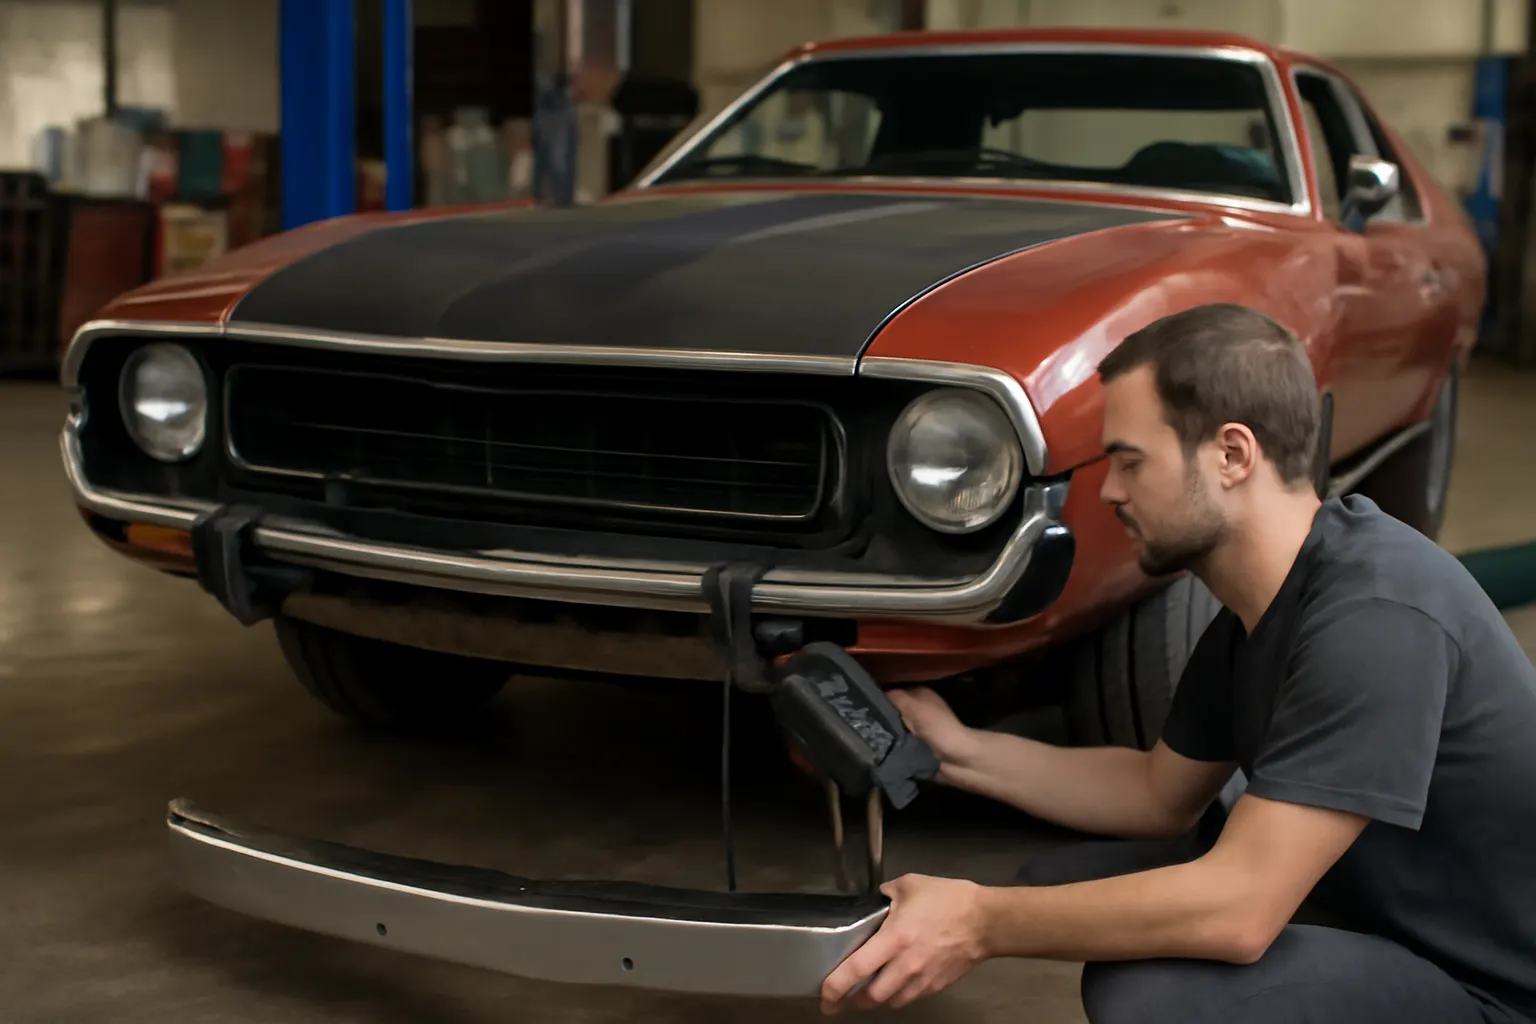
Swapping the front bumper on a classic 1973 AMC Javelin is more than just a bolt-on affair—it’s a multi-stage process that demands diagnostic expertise, sourcing savvy, and a keen understanding of AMC fitment nuances. This field report, direct from a restoration shop specializing in vintage American muscle, details the real-world challenges and solutions involved in a front bumper swap. Whether you’re restoring an AMC Javelin or tackling another classic AMC, these insights will help you avoid costly mistakes and ensure your project meets modern safety and quality standards.
For a comprehensive overview of AMC bumper fitment, replacement, and quality considerations, see our AMC Front Bumper Assembly: Fitment, Quality, and Replacement Guide.
Immediate Answers: What to Expect in a 1973 AMC Javelin Bumper Swap
- Difficulty Level: Moderate to advanced, especially with non-OEM or reproduction parts.
- Time Estimate: 4–8 hours with proper preparation and tools.
- Main Challenges: Fitment discrepancies, hidden rust, hardware compatibility, and alignment for safety and aesthetics.
- Critical Tools: Socket set, torque wrench, body panel shims, inspection mirror, rust penetrant, and safety equipment.
- Key Diagnostic Step: Always test-fit before final mounting to prevent alignment issues.
The Hidden Problem: Not All AMC Bumpers Are Created Equal
Classic AMC bumpers, especially from the early 1970s, are notorious for fitment inconsistencies. Even factory-original parts can vary slightly due to manufacturing tolerances of the era. Aftermarket and reproduction bumpers add another layer of complexity, often requiring modification for proper alignment and secure attachment.
Restoration shops frequently encounter:
- Misaligned Mounting Holes: Slight differences between production runs or aftermarket stampings.
- Corroded Mounting Points: Decades of exposure can weaken frame rails or bumper brackets.
- Missing or Non-Original Hardware: Previous repairs may have used incorrect fasteners, spacers, or shims.
- Material Differences: OEM bumpers were typically heavy-gauge steel, while many reproductions use lighter materials to improve fuel efficiency and reduce shipping costs, as documented by the U.S. Department of Energy’s Materials Technologies.
Understanding AMC Bumper Swap Challenges
Why Fitment Is Never Plug-and-Play
The 1973 AMC Javelin, like many muscle cars of its era, was built before the era of precision robotic manufacturing. As a result, even original bumpers may not line up perfectly with every car. Over the decades, minor collisions, frame tweaks, or replacement of subframe components can all affect bumper alignment.
Common issues include:
- Frame Spread or Twist: Subtle frame damage can cause mounting points to shift by several millimeters.
- Bracket Deformation: Bumper brackets may have been bent during previous impacts or removed and reinstalled out of alignment.
- Panel Gap Variations: Fenders and valence panels might have been replaced or repaired, changing the intended bumper spacing.
The Diagnostic Dilemma
Before committing to a swap, a thorough inspection is essential. Relying solely on visual cues or assuming a new bumper will “pull” panels into alignment is a recipe for frustration and compromised safety. The National Highway Traffic Safety Administration (NHTSA) emphasizes that structural parts like bumpers are critical for occupant safety and crash energy management.
Pre-Swap Inspection: The Restoration Shop Checklist
A methodical pre-swap inspection is the foundation of a successful bumper replacement. Here’s a field-tested checklist used by restoration professionals:
AMC Javelin Bumper Swap Pre-Inspection Checklist
-
Assess Existing Bumper and Mounts:
- Inspect for rust, cracks, or previous weld repairs.
- Check for missing or mismatched hardware.
- Record any signs of impact or deformation.
-
Frame and Bracket Integrity:
- Use a straightedge or plumb line to verify frame rail alignment.
- Inspect mounting brackets for bends or corrosion.
- Confirm bracket part numbers match AMC specifications.
Advertisement
-
Panel and Gap Measurement:
- Measure distance between fender tips and compare to factory spec.
- Note any irregular panel gaps or misaligned valence panels.
-
Test-Fit New Bumper:
- Temporarily mount bumper using hand-tightened bolts.
- Check all hole alignments and adjust as needed.
- Verify clearance for grille, lights, and lower valence.
-
Prepare for Surprises:
- Have shims, washers, and spacers ready.
- Keep rust penetrant and a tap-and-die set on hand for thread repair.
Sourcing the Right Bumper: OEM vs. Reproduction
Original Equipment Manufacturer (OEM)
- Pros: Guaranteed fit, correct gauge steel, original chrome finish.
- Cons: Scarcity, high cost, possible hidden rust, and previous repairs.
Reproduction Bumpers
- Pros: Readily available, sometimes lighter for improved fuel efficiency (DOE Fuel Efficiency), often pre-finished.
- Cons: Potential fitment issues, varying material thickness, and mounting hole discrepancies.
Field Experience: In this 1973 Javelin project, a reproduction bumper was selected for its availability and cost-effectiveness. However, minor modifications were required, including ovalizing two mounting holes and adding shims to achieve correct alignment.
Diagnostic Steps: Identifying and Addressing Fitment Issues
Step 1: Dry Fit and Marking
- Hand-tighten all mounting bolts.
- Check panel gaps around headlights, grille, and fender tips.
- Mark areas where the bumper contacts bodywork improperly.
Step 2: Bracket and Mount Correction
- Bend or shim brackets as needed, using a torque bar or hydraulic press for major adjustments.
- Replace any bent or rusted hardware with new, grade-8 fasteners.
Step 3: Hole Modification (If Required)
- Enlarge or elongate mounting holes using a step bit or rotary file.
- Deburr all edges and apply rust inhibitor to exposed metal.
Step 4: Test for Safety Compliance
- Simulate light impact by applying hand pressure to check for excessive flex or movement.
- Verify that bumper sits parallel to the ground and matches body lines.
Installation: Step-by-Step Field Procedure
1. Preparation
- Disconnect battery to prevent accidental shorts if working near electrical components.
- Support bumper using a padded jack or helper to prevent damage during installation.
2. Mounting the Bumper
- Install brackets loosely to allow for adjustment.
- Align bumper with fender tips and grille before tightening bolts.
- Use shims and washers to fine-tune fitment and maintain even panel gaps.
3. Final Torque and Safety Check
- Tighten all fasteners to manufacturer-specified torque.
- Double-check alignment with a tape measure and visual inspection.
- Inspect for interference with lights, grille, and lower valence.
4. Post-Installation Test
- Gently flex bumper to check for movement.
- Check hood and light operation to ensure no new interference.
- Test drive at low speed and inspect for any new vibrations or noises.
Material Considerations: Steel vs. Modern Alloys
The original AMC bumpers were made from heavy-gauge steel, designed for durability and crash protection. Modern reproduction bumpers may use lighter steel or composite alloys to reduce weight and improve fuel efficiency, as outlined in DOE’s Materials Technologies guidance. While lighter bumpers can improve handling and reduce front-end weight, they may not provide the same level of impact protection as OEM steel units.
Key Takeaways:
- Heavier OEM bumpers offer better crash resistance but may impact fuel economy.
- Lighter reproductions can improve efficiency and ease of installation but require careful inspection to ensure safety and fitment.
Alignment and Safety: Meeting Modern Standards
While classic cars are exempt from some modern safety regulations, proper bumper installation is still critical for occupant protection and vehicle integrity. The NHTSA sets standards for bumper performance, including energy absorption and mounting security.
Advertisement
Restoration shops recommend:
- Always use grade-8 or equivalent fasteners.
- Test for secure attachment by simulating bumper impacts.
- Avoid excessive shimming that could compromise mounting strength.
Troubleshooting Common AMC Bumper Swap Issues
Panel Gaps and Aesthetic Alignment
- Symmetry is key: Uneven gaps between bumper and fenders signal misalignment.
- Check headlight and grille clearance: Bumper should not contact or interfere with adjacent panels.
Mounting Hardware Problems
- Stripped threads: Use thread chasers or install thread inserts as needed.
- Incorrect bolt length: Always match OEM specifications to avoid bottoming out or insufficient engagement.
Chrome and Finish Concerns
- Protect new chrome: Use painter’s tape on bumper edges during installation.
- Address flaking or pitting: Re-chrome or polish as needed before installation.
Post-Installation Maintenance and Inspection
Even after a successful swap, ongoing maintenance is crucial:
- Inspect fasteners annually for tightness and corrosion.
- Clean and wax chrome regularly to prevent rust and pitting.
- Check alignment after any minor front-end impact or bodywork.
Tip: Take detailed photos of your installation for future reference and resale documentation.
Sourcing AMC Bumpers and Hardware: Where Restoration Shops Look
OEM and NOS (New Old Stock) Sources
- Specialty AMC vendors: Often have original or NOS parts at premium prices.
- Swap meets and online auctions: Potential for bargains, but always verify condition.
Reproduction and Aftermarket Parts
- Reputable suppliers: Seek out established brands with a track record of AMC fitment.
- Check return policies: In case of severe fitment issues.
Hardware and Fasteners
- Automotive hardware suppliers: Stock grade-8 bolts, washers, and shims in correct sizes.
- Avoid hardware store bolts: Unless they meet automotive grade and finish requirements.
Expert Tips for a Successful AMC Bumper Swap
- Never force a bumper into place. If mounting holes don’t align, stop and investigate cause—forcing can crack chrome or deform brackets.
- Document every step. Photos and notes help diagnose future issues or assist next owners.
- Invest in quality hardware. Fasteners are as critical as the bumper itself for safety and longevity.
- Use anti-seize compound on all threads to ease future removal and prevent galling.
When to Seek Professional Help
While many enthusiasts can handle a bumper swap with patience and proper tools, certain scenarios call for professional intervention:
- Severe frame misalignment: May require frame shop straightening.
- Extensive rust or corrosion: Structural repairs are best handled by experienced welders.
- Custom modifications: Integrating modern lighting or crash reinforcement is a job for restoration experts.
If you’re unsure about any step, consult a professional or reference our detailed Amc Front Bumper Installation guide for further support.
AutoPartEx: Your Partner in AMC Bumper Restoration
At AutoPartEx, we understand that every AMC bumper swap comes with its own set of challenges. Our technical resources, including the AMC Fitment Guide and Amc Bumper Restoration, are designed to help you navigate sourcing, installation, and maintenance with confidence.
Whether you’re sourcing hard-to-find OEM parts, evaluating reproduction options, or troubleshooting a tricky fitment issue, AutoPartEx connects you with the expertise and inventory to keep your classic AMC on the road—and looking its best.
Conclusion: Field-Tested Success
Swapping the front bumper on a 1973 AMC Javelin is a rewarding project that combines classic restoration skills with modern safety awareness. By following a disciplined diagnostic and installation process, accounting for fitment quirks, and using the right materials and hardware, you can achieve a secure, visually pleasing result that honors both the spirit and the safety of your AMC. For more in-depth technical support, explore our AMC Front Bumper Assembly: Fitment, Quality, and Replacement Guide.
References
Advertisement